NodeJS and oclif: A Simple Guide to CLI Tools

In the realm of software development, command-line interfaces (CLIs) often lag behind in user experience and efficiency. This post introduces a powerful duo, NodeJS and oclif, that is changing the way we build CLIs. By using these tools, developers can create intuitive, efficient command-line applications that delight users. I’ll walk you through enhancing your CLI projects to make them not just functional, but exceptional.
This article is continuation of NodeJS and CLI: Creation Command Line Interface ‘cause here we will try to develop full functionality that we describe in the article above and finish our application.
What is oclif and Why You Should Use It for Creating CLI Tools?
oclif, short for Open CLI Framework, is an open source tool for creating command-line interfaces (CLIs) with NodeJS. More than just a simple options parser; oclif is a fully-fledged framework designed to streamline and simplify the development of sophisticated CLI tools. Its power lies in its ability to provide a rich set of functionality out of the box, minimizing the need for external dependencies.
Designing a Better CLI Experience
Here I will improve our CLI and make it more interactive, enhance the UX/UI, and improve the user experience using the functionality implemented in oclif. First, let me remind you that our CLI should consist of a few commands: create, list, delete, show. But now I will add more interactive functionality and colored messages that should improve the user experience.
Creating a Note
When creating a note, I aim to eliminate the requirement for arguments and flags to be mandatory, introducing interactivity through the prompt function. This approach will prompt users to input any missing data, making the prompt itself mandatory. Now, users won’t have to type out the entire command line; instead, the command will ask for the necessary information if the user hasn’t provided it. This makes the process more user-friendly and interactive.
For example, instead of requiring the user to input the full command like this:
1
$ noty create ToDo -c "Implement new feature."
The command line interface will now interactively prompt the user for the title and content of the note if they are not provided, like so:
1
2
3
$ noty create
Enter note title: ToDo
Enter note content: Implement new feature.
This enhancement significantly improves usability by allowing users to engage more naturally with the CLI, providing a smoother and more intuitive experience.
Listing All Notes
In displaying all notes, I want to introduce a new format for listing them: a table layout. This is to demonstrate how the table function works, enhancing the readability and organization of the displayed information.
For instance, instead of a simple list, users can now view their notes in a structured table format by using the --table flag:
1
2
3
4
5
6
$ noty list --table
 *  Title           Content                         Created
 ── ─────────────── ─────────────────────────────── ───────────────────
 1  Project Meeting Discussed project milestones... 2/27/2024, 16:35:17
 2  Grocery List    Milk, Eggs, Bread, Coke and ... 2/27/2024, 17:13:48
 3  ToDo            Implement feature for addin ... 2/27/2024, 17:38:13
This table format not only makes the list of notes more visually appealing but also allows users to easily scan through titles, content summaries, and creation dates. It’s a significant usability improvement, making the process of reviewing notes more efficient and user-friendly.
Viewing a Note by Title
When viewing a note, I plan to introduce an option for users to select from a list of notes if they don’t specify a particular title. This feature enhances user interaction by providing a more intuitive way to access notes.
For example, if a user wants to view a note but doesn’t input a specific title, the CLI will now offer a selection list:
1
2
3
4
5
$ noty show
? Select a note (Use arrow keys)
❯ Project Meeting
  Grocery List
  ToDo
This method simplifies the process of finding and viewing notes, especially when users might not remember the exact titles. It’s a user-friendly addition that leverages the prompt selection feature, making note management more accessible and efficient.
Deleting Note by Title
For deleting a note, I aim to introduce an interactive confirmation dialog asking the user if they really wish to delete the specified note. This added step ensures that users have a chance to reconsider before permanently removing a note, preventing accidental deletions.
For instance, when a user attempts to delete a note, instead of immediately removing it, the CLI will prompt:
1
2
3
$ noty delete "Grocery List"
Warning: Are you sure you want to delete note [TITLE: Grocery List]? (Y/n): y
Note 'Grocery List' deleted successfully.
This interactive confirmation enhances the user experience by adding a layer of safety to the note deletion process. It’s a thoughtful feature that respects the user’s data, ensuring that deletions are intentional and confirmed.
Generating CLI Project
oclif is a framework that offers an excellent CLI tool for generating components of your application, helping you adhere to the structure and style developed by the oclif team.
To start, you need to generate your project. First, navigate to the directory where you want to deploy your project in the terminal. For me, it’s ~/Desktop/projects/. Then, execute the following command:
1
npx oclif generate noty
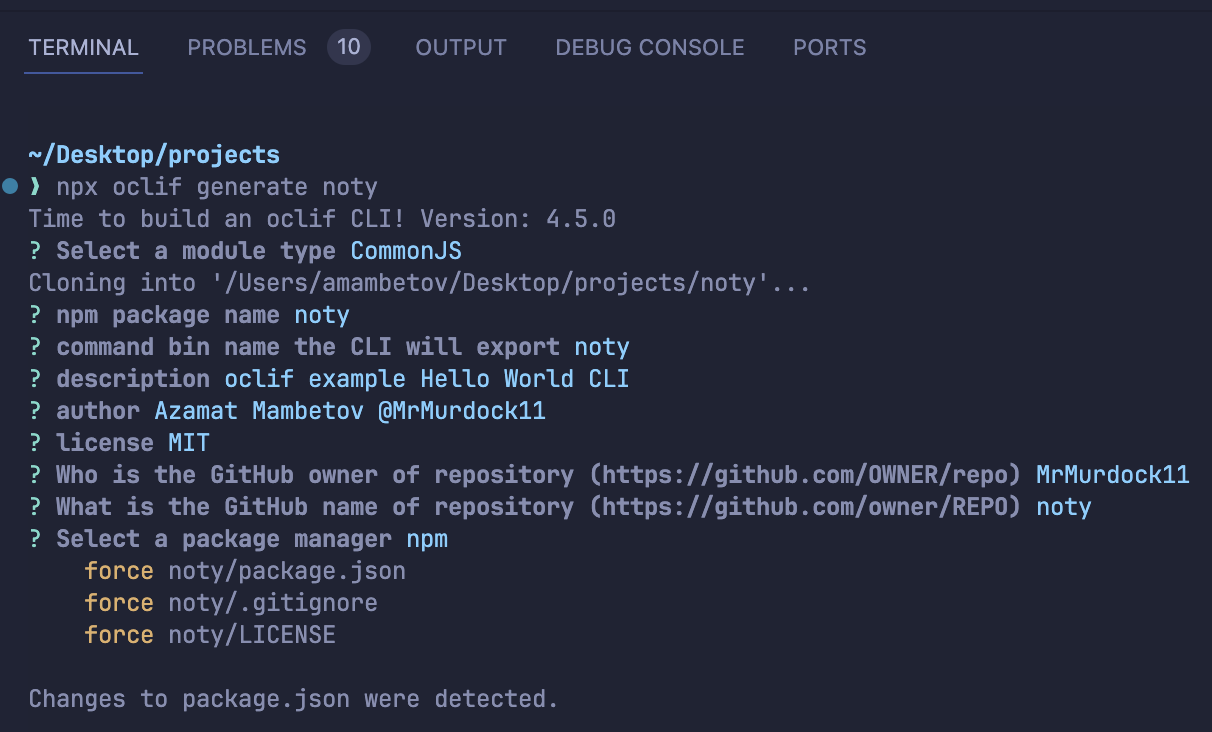
This command creates a noty folder with the source code and dependencies for your project, allowing you to build your project based on oclif. Let’s run the project we just generated. To do this, navigate to the noty folder and call the following command in the terminal:
1
./bin/dev.js help
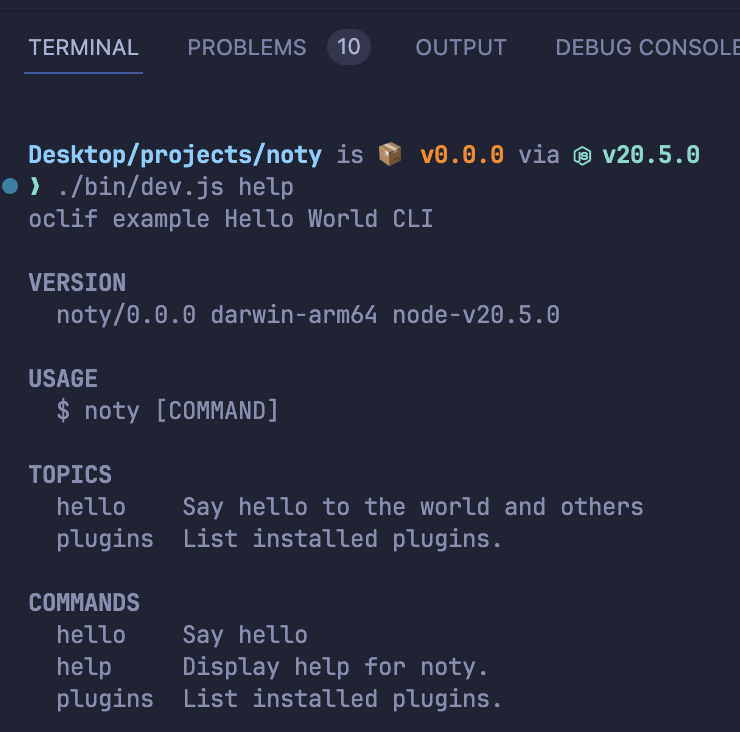
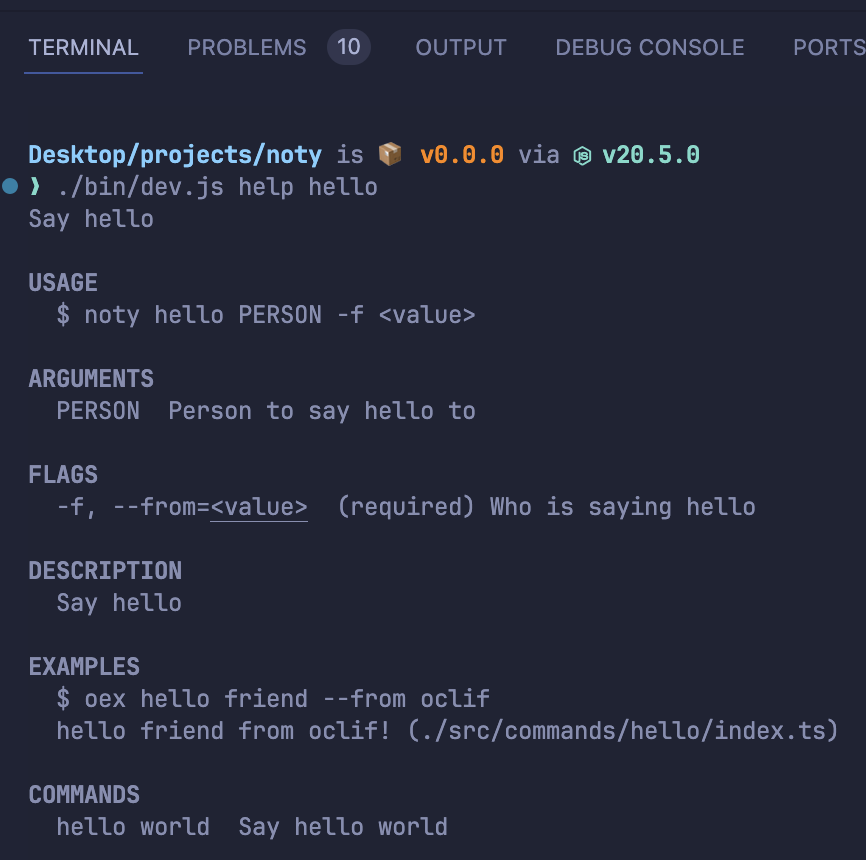
If you need more information about a command, you can execute ./bin/dev.js help [COMMAND]:
1
./bin/dev.js help hello
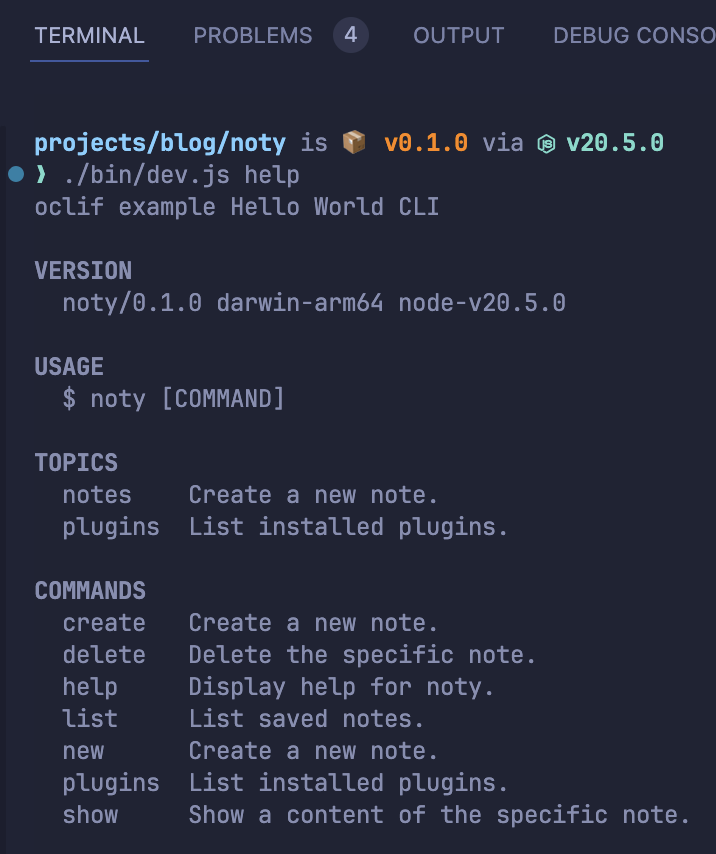
Now, we can move on to the source code of our project. The main logic of our project will be located in topics and commands. Topics are just a subfolder for simplifying the structuring of your large project and creating subcommands.
Currently, the project has one topic hello, which you can delete before starting to implement the application. To do this, remove the hello folder from both the src/commands and tests/commands directories.
Developing Commands
Before we get into the heart of our application’s logic, it’s important to note that the commands in our CLI tool are designed with a modular structure. This design choice simplifies development, maintenance, and future enhancements. To get started and add commands to our CLI tool, we’ll use the oclif generator. To get started, simply run the following command from your project’s root directory:
1
oclif note generate command notes/create
This command adds a create command under the notes topic to our project, along with a file for writing tests for this command. Following the same principle, you should add the other necessary commands to the application: notes/list, notes/show, notes/delete.
By systematically adding these commands, you’re structuring your application to handle the core functionalities of note management, making it easier to develop and test each function in isolation. This approach not only streamlines the development process but also ensures that each part of your application is modular and maintainable.
Configure Commands
Now, I’m ready to configure each command by defining necessary aliases, examples, arguments, flags, and descriptions.
First, let’s ensure the create command appears in the command list when executing ./bin/dev.js --help, complete with a command description. I’d like to set new and create as aliases for creating a new note. Currently, we can only invoke the command as ./bin/dev.js notes create. To achieve this, open the command file in the src/commands/notes/ directory and add aliases and modify the description.
1
2
3
4
5
6
7
export default class NotesCreate extends Command {
	static aliases = ["create", "new"];

	static description = "Create a new note.";

	// ...
}
Similarly, configure the other commands with appropriate aliases and descriptions to enhance usability:
1
2
3
4
5
6
7
export default class NotesList extends Command {
	static aliases = ["list"];

	static description = "List saved notes.";

	// ...
}
1
2
3
4
5
6
7
export default class NotesShow extends Command {
	static aliases = ["show"];

	static description = "Show the specific note.";

	// ...
}
1
2
3
4
5
6
7
export default class NotesDelete extends Command {
	static aliases = ["delete"];

	static description = "Delete the specific note.";

	// ...
}
After running ./bin/dev.js help, you’ll see the commands create, new, list, show, delete in the command list, now accessible without specifying the subcommand notes. This setup makes the CLI more intuitive and user-friendly, allowing for quicker and more straightforward command execution.
Adding Arguments and Flags
At this stage, we’ve added the expected arguments and flags for each command. To do this, we need to define static args and flags fields within the command class. These are initialized using the Args and Flags modules from oclif. Below is the code that needs to be inserted into the commands:
1
2
3
4
5
6
7
8
9
10
11
12
13
14
15
16
17
18
19
20
21
export default class NotesCreate extends Command {
	// ...

	static args = {
		title: Args.string({ description: "Title of the note." }),
	}

	static flags = {
		content: Flags.string({
			char: "c",
			description: "Content of the note.",
		})
	}

	static examples = [
		"<%= config.bin %> <%= command.id %>",
		"<%= config.bin %> <%= command.id %> 'Grocery List' --content 'Milk, Eggs, Bread, Coke, Onion'"
	];

	// ...
}
1
2
3
4
5
6
7
8
9
10
11
12
13
14
15
16
17
18
export default class NotesList extends Command {
	// ...

	static flags = {
		table: Flags.boolean({
			char: "t",
			default: false,
			description: "Show notes in a table format",
		})
	}

	static examples = [
		"<%= config.bin %> <%= command.id %>",
		"<%= config.bin %> <%= command.id %> --table"
	];

	// ...
}
1
2
3
4
5
6
7
8
9
10
11
12
13
14
export default class NotesShow extends Command {
	// ...

	static args = {
		title: Args.string({ description: "Title of the note.", required: true })
	};

	static examples = [
		"<%= config.bin %> <%= command.id %>",
		"<%= config.bin %> <%= command.id %> 'Grocery List'"
	];

	// ...
}
1
2
3
4
5
6
7
8
9
10
11
export default class NotesDelete extends Command {
	// ...

	static args = {
		title: Args.string({ description: "Title of the note.", required: true })
	}

	static examples = ["<%= config.bin %> <%= command.id %> 'Grocery List'"];

	// ...
}
After adding arguments and flags, let’s verify their presence, for example, with the create command. By executing ./bin/dev.js help create, you will see the command description along with all arguments and flags as shown in the image below.
![[help_create_command.png]]
The image would display the usage pattern, arguments, flags, description, call combinations, and examples of how to use the command.
Enhancing the Create Command
We’re now ready to write the logic for creating a note. The Command class has an abstract method run that needs to be implemented. This method is called when the user executes the command. In simple terms, this is where you write the command logic you want to implement.
1
2
3
4
5
6
7
8
9
10
11
12
13
14
15
16
17
18
19
20
21
22
23
24
25
26
27
28
29
30
31
32
33
import { Args, Flags, ux } from "oclif/core";

// ...

export default class NotesCreate extends Command {
	// ...

	public async run(): Promise<void> {
		const { args, flags } = await this.parse(NotesCreate);

		if (!args.title) {
			args.title = await ux.prompt(
				ux.colorize("blue", "Enter note title"),
				{ required: true }
			);
		}

		if (!flags.content) {
			flags.content = await ux.prompt(
				ux.colorize("blue", "Enter note content"),
				{ required: true }
			);
		}

		const addNoteResult = await addNote(args.title, flags.content);
		if (addNoteResult.isFailure) {
			const { message, suggestions } = addNoteResult.error;
			this.error(message, { suggestions });
		}

		this.log(ux.colorize("green", "Note created successfully."));
	}
}
Let’s break this down. The this.parse(...) function parses the static fields of the class to obtain the arguments and flags objects, then initializes these objects with values from the invoked command.
Another notable feature is the import of the ux module, which contains all the tools for improving UX/UI of your CLI application. The ux.prompt(...) function allows the user to input data necessary for the command’s correct operation, similar to entering values in a web application’s input fields. In this case, the fields are mandatory, which is why the required: true option is specified.
We also see a shift in logic handling. Most of the logic for reading and writing data to a storage file has been moved to a separate set of functions with a single responsibility: managing the storage file. To avoid using try-catch blocks and handle error processes more flexibly, I used the “result” pattern. While this article won’t cover the pattern or its implementation, you can find the project code here.
This approach not only simplifies the command’s logic but also enhances user interaction, making the process of creating notes more intuitive and error-resistant.
Enhancing the List Command
The next command we’ll enhance is for listing notes, which we aim to display in two formats: custom and tabular.
1
2
3
4
5
6
7
8
9
10
11
12
13
14
15
16
17
18
19
20
21
22
23
24
25
26
27
28
29
30
31
32
33
34
35
36
37
38
39
40
41
42
43
44
45
46
47
48
49
50
51
52
53
54
55
56
57
58
59
60
61
62
63
64
65
66
67
68
69
import { Flags, ux } from "oclif/core";

export default class NotesList extends BaseCommand {
	// ...

	private readonly _contentMaxLength = 25;

	public async run(): Promise<void> {
		const { flags } = await this.parse(NotesList);

		const getNotesResult = await getNotes();
		if (getNotesResult.isFailure) {
			const { message, suggestions } = getNotesResult.error;
			this.error(message, { suggestions });
		}

		const notes = getNotesResult.value;
		if (flags.table) {
			this.displayNotesAsTable(notes);
		} else {
			this.displayNotesAsList(notes);
		}
	}

	private displayNotesAsList(notes: NotesModel): void {
		this.log("Notes Lists\n───────────");

		const notesList = Object.entries(notes)
			.map(([title, [date, content]], index) => `${ux.colorize("green", `${index + 1}. ${title}`)} - ${formatDate(date)}\n ${ux.colorize("blue", this.truncate(content, this._contentMaxLength))}`
			)
			.join("\n");

		this.log(notesList);
	}

	private displayNotesAsTable(notes: NotesModel): void {
		const mappedNotes = Object.entries(notes).map(
			([title, [date, content]], index) => ({
				content,
				date: formatDate(date),
				index: index + 1,
				title,
			}));

		ux.table(mappedNotes, {
			index: {
				get: (row) => ux.colorize("green", row.index.toString()),
				header: "*",
				minWidth: 3,
			},
			title: {
				minWidth: 7,
				get: (row) => ux.colorize("green", row.title),
			},
			content: {
				minWidth: 7,
				get: (row) => ux.colorize("blue", row.content),
			},
			date: {
				header: "Created",
				get: (row) => formatDate(row.date),
			},
		});
	}

	private truncate(str: string, limit: number): string {
		return str.length > limit ? str.slice(0, limit) + "..." : str;
	}
}
In this example, the focus is on the ux.table function for displaying data in a table format. This function takes an array of objects (the data to be displayed), column configurations, and options. The displayNotesAsList method provides a simple list view, while displayNotesAsTable offers a more structured, tabular view, making it easier for users to digest the information. This dual display functionality enhances the flexibility and user experience of the CLI tool.
Enhancing the Show Command
When displaying a specific note, we currently use ux.colorize(...) to visually distinguish properties and their values. However, in this example, I’d like to demonstrate that the ux module offers only a basic implementation meant for simple tasks. For more complex implementations, the documentation recommends using the inquirer package, which provides a broader set of functionalities.
1
2
3
4
5
6
7
8
9
10
11
12
13
14
15
16
17
18
19
20
21
22
import { Args, ux } from "oclif/core";

export default class NotesShow extends BaseCommand {
	// ...

	public async run(): Promise<void> {
		const { args } = await this.parse(NotesShow);

		const getNoteResult = await getNote(title);
		if (getNoteResult.isFailure) {
			const { message, suggestions } = getNoteResult.error;
			this.error(message, { suggestions });
		}

		const note = getNoteResult.value;
		const [date, content] = note;
		this.log(`Showing note ${ux.colorize("yellow", args.title)}.\n`);
		this.log(`${ux.colorize("green", "Title:")} ${ux.colorize("blue", args.title)}`);
		this.log(`${ux.colorize("green", "Created:")} ${ux.colorize("blue", formatDate(date))}`);
		this.log(`${ux.colorize("green", "Content:")}\n${ux.colorize("blue", content)}`);
	}
}
For this example, I’d like to add a selector that offers the user a choice from a list of available notes if they don’t enter the name of the note they’re looking for. First, add the @inquirer/select dependency to the project with the following command:
1
npm i @inquirer/select
Then, make some changes to the source code to expand the functionality of our command.
1
2
3
4
5
6
7
8
9
10
11
12
13
14
15
16
17
18
19
20
21
22
23
24
25
26
27
28
29
30
31
32
33
34
35
36
37
38
39
40
41
42
43
44
45
46
47
48
49
50
51
52
53
54
55
56
57
58
59
60
61
62
63
64
65
66
67
import { Args, ux } from "oclif/core";
import select from "@inquirer/select";

export default class NotesShow extends BaseCommand {
	// ...

	public async run(): Promise<void> {
		const { args } = await this.parse(NotesShow);

-		const getNoteResult = await getNote(title);
-		if (getNoteResult.isFailure) {
-			const { message, suggestions } = getNoteResult.error;
-			this.error(message, { suggestions });
-		}

-		const note = getNoteResult.value;
-		const [date, content] = note;
-		this.log(`Showing note ${ux.colorize("yellow", args.title)}.\n`);
-		this.log(`${ux.colorize("green", "Title:")} ${ux.colorize("blue", args.title)}`);
-		this.log(`${ux.colorize("green", "Created:")} ${ux.colorize("blue", formatDate(date))}`);
-		this.log(`${ux.colorize("green", "Content:")}\n${ux.colorize("blue", content)}`);

+		await (args.title
+			? this.showNote(args.title)
+			: this.selectAndShowNote()
+		);
	}

+	private displayNote(title: string, note: NoteModel): void {
+		const [date, content] = note;
+
+		this.log(`Showing note ${ux.colorize("yellow", title)}.\n`);
+		this.log(`${ux.colorize("green", "Title:")} ${ux.colorize("blue", title)}`);
+		this.log(`${ux.colorize("green", "Created:")} ${ux.colorize("blue", formatDate(date))}`);
+		this.log(`${ux.colorize("green", "Content:")}\n${ux.colorize("blue", content)}`);
+	}
+
+	private async selectAndShowNote(): Promise<void> {
+		const getNotesResult = await getNotes();
+		if (getNotesResult.isFailure) {
+			const { message, suggestions } = getNotesResult.error;
+			this.error(message, { suggestions });
+		}
+
+		const selectedTitle = await select({
+			choices: Object.entries(getNotesResult.value).map(([title]) => ({
+				name: title,
+				value: title,
+			})),
+			message: "Select a note",
+		});
+
+		const note = getNotesResult.value[selectedTitle];
+		this.displayNote(selectedTitle, note);
+	}
+
+	private async showNote(title: string): Promise<void> {
+		const getNoteResult = await getNote(title);
+		if (getNoteResult.isFailure) {
+			this.log(getNoteResult.error);
+			return;
+		}
+
+		const note = getNoteResult.value;
+		this.displayNote(title, note);
+	}
}
Now, our CLI will offer the user a choice from their list of notes to display, enhancing the user experience by making it easier to access and view specific notes.
Enhancing the Delete Command
When deleting a note, it’s crucial to add a confirmation message asking the user for their approval before removing the note from the list. This step ensures that users are fully aware of the action they’re about to take and prevents accidental deletions.
1
2
3
4
5
6
7
8
9
10
11
12
13
14
15
16
17
18
19
20
21
22
23
24
25
26
27
28
29
30
31
32
33
34
35
36
37
38
import { Args, ux } from "oclif/core";

export default class NotesDelete extends BaseCommand {
	// ...

	public async run(): Promise<void> {

		const { args } = await this.parse(NotesDelete);

		const confirmed = await ux.confirm(
			ux.colorize(
				"red",
				`Warning: Are you sure you want to delete note ` +
				ux.colorize("yellow", `[TITLE: ${args.title}]`) +
				`? ` +
				ux.colorize("blue", "(Y/n)")
			)
		);

		if (!confirmed) {
			this.log(ux.colorize("blue", "Operation cancelled."));
			return;
		}

		const removeNoteResult = await removeNote(args.title);
		if (removeNoteResult.isFailure) {
			const { message, suggestions } = removeNoteResult.error;
			this.error(message, { suggestions });
		}

		this.log(
			ux.colorize(
				"green",
				`Note '${ux.colorize("yellow", args.title)}' deleted successfully.`
			)
		);
	}
}
In this enhanced version, the ux.confirm method is used to prompt the user for confirmation, leveraging a straightforward message. If the user decides not to proceed (!confirmed), the operation is cancelled, and a message is logged to inform the user. Upon confirmation, the command attempts to delete the specified note and informs the user of the outcome, ensuring a clear and user-friendly process for note management.
What About Hooks?
One of the most important features provided by oclif is hooks. Hooks allow you to use lifecycle events of your CLI application, such as init, prerun, postrun, and command_not_found. This provides developers with a broader toolkit for application management and the ability to create custom hooks.
In our case, I wanted to move the storage file initialization process into a separate init type hook. To create the hook, we will still use the generator and simply run the following command from the directory of your project:
1
npx oclif generate hook init-storage
Here’s more information about the hook generation process.
Generated hook file you can find in ${rootDir}/src/hooks/init directory. The next step is to implement the logic for checking and creating the store file with the default value.
1
2
3
4
5
6
7
8
9
10
11
12
13
14
15
import * as toml from "@iarna/toml";
import { Hook } from "@oclif/core";
import * as fs from "node:fs";
import * as path from "node:path";

import { DEFAULT_STORAGE, STORAGE_NAME } from "../../common/constants";

const hook: Hook<"init"> = async function (opts) {
	const storagePath = path.join(opts.config.dataDir, STORAGE_NAME);

	if (!fs.existsSync(storagePath))
		fs.writeFileSync(storagePath, toml.stringify(DEFAULT_STORAGE), "utf8");
};

export default hook;
This implementation ensures that before any command is executed, the CLI checks for the existence of a storage file and creates it with default content if it doesn’t exist. This approach simplifies the management of persistent data across different commands, increasing the robustness and reliability of the application.
Conclusion
In conclusion, it’s clear that oclif is a powerful framework, and capturing all of its functionality in a single article is quite challenging. For instance, we haven’t even touched on plugins, testing, auto-documentation, autocompletion, building CLI for different operating systems, and package publishing. You can find all this information and more in the official framework documentation.
With this article, I aimed to demonstrate how easily you can implement your projects using oclif. The strength of it lies in its ability to streamline the complexities of CLI development, allowing us to focus on crafting an intuitive user experience without being overwhelmed by boilerplate code.
Thank you so much for reading this article to the end; you have iron nerves and patience. If you have any tips or tricks to share, please leave your comments below 👇. Share your thoughts, and let’s learn from each other. If you’ve already created or are planning to create your CLI tool, share your experiences and challenges. And if you’re interested in diving deeper into technology discussions or collaborations, find me on LinkedIn or GitHub. Don’t forget to hit the repost button if you found this guide helpful. Your support motivates me to continue sharing new tips and guides. See you somewhere 🚀✨.